On this page
- Why Your Summer Harvest Calendar Is the Best Fall Planning Tool You Already Own
- Reading Your Summer Calendar: What the Data Actually Tells You
- Calculating Your Fall Planting Windows from First Frost Dates
- Matching Crops to Your Available Growing Days
- Succession Planting Within Your Fall Schedule to Extend Harvest
- Soil Prep Timing: Working Backwards from Planting Dates
- Cost Breakdown: Tools and Seeds for Fall Garden Planning
- Adjusting Your Schedule by USDA Hardiness Zone
- Common Scheduling Mistakes and How to Avoid Them
- Frequently Asked Questions
Why Your Summer Harvest Calendar Is the Best Fall Planning Tool You Already Own
Most gardeners treat fall planting like a separate project — something to figure out in August when Summer crops start winding down. But if you kept even rough notes on what you grew this summer, when you picked it, and how much space it took up, you already have the foundation of a solid fall planting schedule. The problem isn’t a lack of information. It’s knowing how to read what you already recorded and turn it into action dates for cool-season crops.
This guide walks you through exactly that process: taking your summer harvest calendar — whether it’s a dedicated app, a paper notebook, or a few sticky notes on the fridge — and using it to build a fall Garden schedule that’s specific to your beds, your climate, and your actual eating habits.
Reading Your Summer Calendar: What the Data Actually Tells You
Before you can plan fall planting, spend 20 minutes going through your summer records with a specific goal: identifying gaps, timing patterns, and bed availability windows.
What to Look For
- Final harvest dates by crop: When did you pull your last zucchini? When did the bean plants give out? These dates tell you when beds will open up for replanting.
- Crop performance notes: If a tomato variety consistently underperformed or a bed got too much afternoon shade, fall is the time to reassign those spaces.
- What you actually ate vs. what you grew: If your summer journal shows you harvested 14 pounds (6.4 kg) of cucumbers but only used half of them, don’t plant a fall crop of cucumbers just because you have space.
- How long each crop occupied the bed: A bed that held lettuce from April to June freed up much earlier than a bed locked in tomatoes until October. Knowing your bed turnover pattern helps you see which spots realistically open for fall planting.
Turning Notes Into a Bed Map
Draw a simple sketch of your garden — even rough rectangles on a piece of paper work fine. Label each bed or section with the summer crop that occupied it, the approximate last harvest date, and the square footage or dimensions. This single-page reference becomes the foundation of your fall schedule. You’re not guessing at availability; you’re reading it directly from what already happened.

Calculating Your Fall Planting Windows from First Frost Dates
Everything in fall garden planning flows backward from one number: your average first frost date. This is your hard deadline — the point after which tender crops die and even cold-hardy crops stop putting on meaningful growth without protection.
Finding Your First Frost Date
The USDA plant hardiness zone map gives you general temperature ranges, but frost dates are more location-specific. The Old Farmer’s Almanac frost date tool (almanac.com) and the National Gardening Association’s frost date database both allow you to enter your zip code and get average first and last frost dates based on historical data. Use the 50% probability date as your baseline — that’s the date when frost is as likely as not. For crops you want to guarantee, use the 90% probability date instead.
The Backward-Planning Formula
Once you have your first frost date, the math is straightforward:
- Find the “days to maturity” number on your seed packet for each crop you want to grow.
- Add a 2-week buffer. Cool-season crops grow more slowly as temperatures drop in fall than seed packet numbers (which are usually based on spring growing conditions) suggest.
- Count backward from your first frost date by that total number of days. That’s your latest safe planting date for that crop.
Example: You want to grow kale, which matures in 55 days. Add 14 days for the fall slowdown buffer: 69 days total. If your first frost date is October 15, count back 69 days — your latest planting date is around August 7. Plant before that date and you’ll have mature kale before frost hits.
Write these latest planting dates next to each crop you’re considering. You now have a firm schedule boundary for every bed.
Matching Crops to Your Available Growing Days
Not every bed opens up at the same time, and not every crop has the same days-to-maturity requirement. The key is pairing the right crop to the right bed based on how many growing days you actually have left when that bed becomes available.
Short-Season Crops (30–45 Days)
These are your best options for beds that don’t open until late summer. If a tomato bed isn’t fully cleared until late August and your first frost is mid-October, you’re working with roughly 45–50 days of good growing weather. Crops that fit this window include:

- Arugula (30–40 days)
- Radishes (25–30 days)
- Spinach (37–45 days)
- Baby lettuce mixes (30–40 days)
- Bok choy (45–50 days)
Medium-Season Crops (50–70 Days)
These need beds that free up in mid to late July. Good candidates include:
- Kale (55–65 days)
- Swiss chard (50–60 days)
- Beets (50–70 days)
- Broccoli raab (40–60 days)
- Green onions (60–70 days)
Long-Season Fall Crops (70–90+ Days)
Broccoli, cabbage, and Brussels sprouts need to go in early — often while summer crops are still producing in other beds, which means starting transplants indoors in late June or early July and using a dedicated space. These crops reward the effort, though. There’s something almost magical about cutting a dense, blue-green broccoli head in late October when the rest of the garden has gone quiet — the slight sweetness that cool air brings to brassicas is something you won’t get from a summer harvest.
Succession Planting Within Your Fall Schedule to Extend Harvest
A common mistake is treating fall planting as a single event — you plant everything at once in late July or August and then harvest it all in a compressed window in October. Succession planting spreads that harvest out over six to eight weeks and keeps fresh greens coming to the table through November in many regions.
How to Build Succession Intervals Into Your Schedule
For fast-maturing greens like spinach, arugula, and lettuce, plant a new small batch every 10–14 days starting from your earliest possible planting date. Each sowing takes only a small amount of bed space — even a 1-square-meter (about 10-square-foot) patch will yield meaningful salads for two people. Here’s a sample succession schedule for a gardener with a first frost date of October 20:
- Sowing 1: August 1 — harvest around September 10–15
- Sowing 2: August 14 — harvest around September 25
- Sowing 3: August 28 — harvest around October 8–12
- Sowing 4: September 10 — harvest before October 20 if fall is mild, or use as cut-and-come-again baby greens before frost
Mark each sowing date on your fall calendar with the expected harvest window right next to it. This keeps you from the end-of-season scramble where everything ripens at once and you’re eating salad three times a day trying to keep up.
Staggering Brassica Transplants
With transplanted crops like kale and broccoli, you can also succession-plant by setting out transplants two weeks apart rather than all at once. Start an initial flat indoors, then start a second flat two weeks later. The first batch goes into the ground first; the second follows. This staggers your harvest by two to three weeks with minimal extra effort.

Soil Prep Timing: Working Backwards from Planting Dates
Your fall planting calendar isn’t just about seeds. It needs to account for the time required to prepare the beds that are coming out of summer production. Soil that just held heavy-feeding crops like corn, squash, or tomatoes needs amendment before it’s ready to support fast-growing fall greens.
A Practical Soil Prep Timeline
Work backwards from each bed’s planting date to schedule soil prep:
- 2–3 weeks before planting: Clear spent plants, remove stakes, and pull roots where possible. Chop and compost what you can; bag and dispose of any disease-infected material — don’t compost it.
- 2 weeks before planting: Turn in compost and any amendments. A 5–7 cm (2–3 inch) layer of finished compost worked into the top 20 cm (8 inches) of soil rebuilds organic matter after a season of heavy cropping. If a soil test shows low nitrogen (common after heavy feeders), work in a balanced granular fertilizer at this stage.
- 1 week before planting: Rake beds smooth, water well, and let the soil settle. If you’re planting direct-seeded crops like carrots or beets, this settling period prevents seeds from washing into uneven depressions.
- Day of planting: Check soil moisture. Fall soil often dries quickly in late-summer heat. Soil should be moist but not soggy — it should clump loosely when squeezed but not stick to your hands.
Quick-Turnaround Beds
Sometimes a summer crop finishes and you need to plant within a week. In that case, skip deep tillage. Remove the old plants, top-dress with 5 cm (2 inches) of compost, rake it in shallowly, and plant. It’s not ideal, but cool-season greens are forgiving and will root into the fresh compost within days. You can always side-dress with a liquid fertilizer two weeks after planting to make up for the rushed prep.
Cost Breakdown: Tools and Seeds for Fall Garden Planning
One of the best things about fall gardening is that it costs significantly less than spring planting. You’re not buying starts, you’re direct-seeding most crops, and the infrastructure is already in place. Here’s a realistic look at what fall planning and planting actually costs.
Seeds
- Budget tier: Seeds from large-chain stores (Burpee, Ferry-Morse) — $2.00–$3.50 per packet. Quality is adequate, though variety selection is limited to the most popular cultivars.
- Mid-range tier: Seeds from regional or specialty suppliers (Johnny’s Selected Seeds, Territorial Seed Company, High Mowing Organic Seeds) — $3.50–$6.00 per packet. Better germination rates, wider cool-season variety selection, and more detailed growing notes.
- Premium tier: Heirloom and rare varieties from small seed companies or seed libraries — $5.00–$9.00 per packet. Worth it for unique flavor profiles and open-pollinated varieties you can save for next year.

A full fall garden of 4–6 beds typically requires 6–10 seed packets, so plan on spending $20–$60 on seeds depending on where you shop and what you grow.
Soil Amendments
- Bagged compost: $6–$12 per 40 lb (18 kg) bag. One bag covers approximately 4 square meters (40 square feet) at a 5 cm (2 inch) depth.
- Balanced granular fertilizer (10-10-10 or similar): $12–$25 for a 5 lb (2.3 kg) bag. One bag handles multiple beds for the entire fall season.
- Bulk compost (delivered): $35–$65 per cubic yard, depending on region. More economical if you’re amending multiple large beds.
Planning Tools
- Paper garden journal: $0–$20. A basic composition notebook works fine.
- Spreadsheet templates: Free. Google Sheets has several gardening calendar templates available at no cost.
- Garden planning apps (Planter, Gardenize, GrowVeg): $0–$29.99/year. Most offer free tiers with enough functionality for a home garden.
Adjusting Your Schedule by USDA Hardiness Zone
The same fall planting calendar doesn’t work in Minnesota and Mississippi. Your hardiness zone (and more specifically, your local frost dates) fundamentally changes what you can grow, when you plant it, and how long your fall season lasts.
Zones 3–4 (Northern Minnesota, Northern Maine, Upper Michigan)
First frost often arrives between September 1–15. That gives you a very short fall window — roughly 6–8 weeks of productive growing after summer solstice crops wrap up. Focus on ultra-fast crops: radishes, arugula, baby spinach, and Asian greens like tatsoi. Direct-sow in late July; don’t wait. Row cover or low tunnels are essentially mandatory for any harvest past early September.
Zones 5–6 (Pacific Northwest, Great Lakes, Mid-Atlantic)
First frost typically falls between October 1–31, giving you a solid 10–14 week fall planting window. This is the sweet spot for fall gardening. You can grow the full range of cool-season crops: kale, chard, beets, carrots, broccoli, cabbage, and multiple successions of salad greens. Start warm-season bed transitions in mid-July for the best results.
Zones 7–8 (Pacific Coast, Mid-South, Pacific Northwest lowlands)
First frost may not arrive until November or later, and mild winters allow some crops to overwinter entirely without protection. Fall planting can extend well into October for fast-maturing crops. In Zone 8 (coastal California, Pacific Northwest lowlands, Gulf Coast), fall is actually the primary growing season for brassicas and root vegetables — the summer heat is the limiting factor, not frost.

Zones 9–10 (Southern California, Gulf Coast, Hawaii)
Fall planting begins in September or October once summer heat breaks. Frost is rarely a concern. Gardeners in these zones can grow tomatoes, peppers, and beans into the fall while simultaneously running a cool-season bed for lettuce, carrots, and broccoli. The “fall planting schedule” here is really a fall-through-spring schedule, and summer is the down season.
Common Scheduling Mistakes and How to Avoid Them
Even experienced gardeners run into the same recurring problems when building a fall planting schedule. Knowing what trips people up saves you the frustration of a season that doesn’t deliver what you planned.
Planting Too Late
The single most common fall gardening mistake. Gardeners see summer crops still producing in July and feel reluctant to start fall planning. Then August arrives, they pull the summer plants, and realize they’ve missed the planting window for anything beyond fast-maturing greens. Set a non-negotiable date on your calendar — typically 10–12 weeks before your average first frost — to begin fall planting regardless of what summer crops are still going.
Underestimating Germination Challenges
Germinating seeds in late summer is harder than germinating them in spring. Soil temperatures above 27°C (80°F) dramatically reduce germination rates for cool-season crops, particularly lettuce and spinach, which go dormant above 24°C (75°F). Sow seeds in the evening to take advantage of cooler overnight temperatures, water immediately after sowing to drop soil temp, and consider using a thin layer of burlap or shade cloth over the seedbed for the first week to hold moisture and moderate heat.
Ignoring Bed-Specific Microclimates
A south-facing raised bed that bakes in August afternoon sun behaves very differently in fall than a north-facing bed that gets shade from a fence or building. When assigning fall crops to beds, think about where the light will actually land in October — the sun is lower in the sky, and shade patterns shift significantly from summer. That shady corner that was too dark for tomatoes may get enough direct fall sun for a productive kale patch.
Not Accounting for Watering Needs at Germination
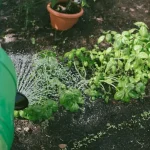
Fall-seeded beds need consistent moisture to germinate — often more frequent watering than spring beds because late-summer heat dries the soil surface quickly. If you rely on automatic drip irrigation, check that emitters reach the seeded areas. Drip lines placed for established summer plants often miss the row spacing you’ll use for fall direct seeding. A simple oscillating sprinkler or a watering can with a rose head used twice a day for the first two weeks is often the most reliable solution.

Forgetting to Plan for Frost Protection
Your planting schedule should include a row cover procurement date. If your first frost date is October 15, you want row cover fabric on hand by October 1. Floating row cover (also called Reemay or Agribon) in a 1.2 oz weight extends your season by 4–6°F (2–3°C). A heavier 1.5–2 oz weight can protect down to around 24°F (-4°C), allowing spinach and kale to produce well into late fall. The satisfying crunch you get from cold-hardened kale — tender but with a slight resistance, deeply savory after a frost has converted its starches to sugar — is worth the extra planning.
Frequently Asked Questions
How far in advance should I start planning my fall garden?
Start planning in late June or early July — about 10–14 weeks before your average first frost date. This gives you enough lead time to order seeds, prep soil as beds open up, and start any transplants that need indoor time before going in the ground. Waiting until August means missing the planting window for slower crops like broccoli and cabbage.
Can I use the same soil from my summer garden for fall crops without amending it?
Technically yes, but you’ll see weaker growth. Heavy summer feeders like tomatoes and corn deplete nitrogen and organic matter significantly. Adding a 5 cm (2 inch) layer of compost worked into the top 15–20 cm (6–8 inches) of soil before fall planting makes a noticeable difference in germination speed, early growth, and overall yield from your fall beds.
What cool-season crops are most forgiving for beginner fall gardeners?
Radishes, arugula, and spinach are the best starting points. All three germinate quickly (even in warm late-summer soil), mature fast enough to give you a harvest before frost, and are difficult to truly ruin. Kale is also extremely forgiving — it tolerates inconsistent watering, poor soil, and light frost better than almost any other vegetable crop.
How do I know if my summer harvest calendar has enough information to plan fall planting?

You need three things: which beds each crop occupied, an approximate final harvest date for each crop, and the rough square footage of each bed. If you have those three data points — even estimated — you have enough to calculate bed availability windows and match fall crops to realistic planting dates. Perfect records aren’t necessary; rough notes are enough.
What’s the best way to handle a bed that won’t open up until September?
Focus entirely on crops with a 30–40 day maturity window: radishes, arugula, baby salad mix, and tatsoi. In zones 6 and warmer, you can also try a fast-maturing spinach variety under row cover to extend the harvest window past your first frost date. Don’t attempt broccoli, cabbage, or beets — they won’t have enough growing days to reach maturity before hard frost shuts down growth.
Explore more
Growing Watermelons: Tips for Growing and Harvesting Juicy Watermelons
How to Choose the Right Plants for Your Garden’s Light Conditions: A Beginner’s Guide
5 Signs Your Shrubs Are Ready for Summer Pruning
📷 Featured image by Frecia Chirinos on Unsplash.