On this page
- Why Most Kitchen Herb Gardens Fail Before Summer Ends
- Choosing the Right Herbs for Your Kitchen
- Starting Herbs from Seed vs. Buying Transplants
- Soil, Containers, and Growing Conditions
- Watering, Feeding, and Common Mistakes
- Harvesting the Right Way to Keep Plants Producing
- Preserving and Storing Fresh Herbs
- Seasonal Growing Guide by USDA Zone
- Cost Breakdown: Starting a Herb Garden on Any Budget
- Using Fresh Herbs in the Kitchen
- Frequently Asked Questions
Why Most Kitchen Herb Gardens Fail Before Summer Ends
You’ve bought the little plastic pots of basil and parsley from the grocery store, set them on the windowsill with good intentions, and watched them slowly yellow and collapse within three weeks. It’s one of the most common gardening frustrations — and it’s almost never the gardener’s fault. Those supermarket herbs are actually dozens of seedlings crammed into a single pot, grown under perfect greenhouse conditions, and sold to be used immediately rather than kept alive. Growing herbs properly is a different thing entirely, and once you understand a few fundamentals, fresh herbs become one of the easiest and most rewarding things you can grow at home. This guide covers everything from choosing the right plants through to cooking with them at their peak.
Choosing the Right Herbs for Your Kitchen
The best herb garden is built around how you actually cook — not around what looks good at the nursery. There’s no point growing a large patch of tarragon if you never make béarnaise sauce. Start by thinking about the dishes you make most often, then match your herbs to those meals.
For everyday cooking, a core five covers most cuisines well: basil, flat-leaf parsley, chives, thyme, and rosemary. From those five plants, you can season pasta sauces, roasted vegetables, grilled meats, soups, salads, and eggs. If you cook a lot of Mexican or Central American food, swap one of those for cilantro. If you lean into Asian cooking, Thai basil and Vietnamese coriander are worth the space.
It also helps to separate herbs by their growth habit and lifespan:
- Annual herbs (complete their life cycle in one season): basil, cilantro, dill, chervil. These need replanting each year.
- Perennial herbs (come back year after year in mild climates): rosemary, thyme, oregano, sage, chives, mint, tarragon. Once established, these are largely self-sustaining.
- Biennial herbs (grow leaves in year one, flower and seed in year two): parsley technically falls here, though most gardeners treat it as an annual.
Mint deserves a special warning: it spreads aggressively through underground runners and will take over a bed within a season. Always grow mint in a container, even if everything else is in the ground.
Starting Herbs from Seed vs. Buying Transplants
Both approaches work, and the right choice depends on your timeline, budget, and which herb you’re growing.
Starting from seed gives you more variety options, lower cost per plant, and the satisfaction of watching something grow from scratch. It’s the better choice for fast-germinating herbs like basil, dill, cilantro, and chives. Direct-sow cilantro and dill where they’ll grow — they dislike transplanting and their taproots don’t recover well from being disturbed.

For indoor seed starting, most herb seeds germinate best at soil temperatures between 18–24°C (65–75°F). A heat mat speeds things up significantly. Basil seeds, for example, can germinate in 5–7 days with bottom heat versus 10–14 days without it. Sow seeds about 3–6mm (⅛–¼ inch) deep in a quality seed-starting mix, keep the medium consistently moist but not waterlogged, and provide 14–16 hours of light per day under grow lights.
Buying transplants makes more sense for slow-growing perennials like rosemary, thyme, and sage. These can take 3–4 months to reach a useful size from seed, and a $4–6 nursery start gives you a head start of several weeks. It’s also the practical choice for anyone who missed the optimal seed-starting window.
For herbs you plan to start indoors before the last frost, here’s a rough timing guide counting back from your transplant date:
- Basil: 6–8 weeks before last frost
- Parsley: 10–12 weeks before last frost (slow to germinate — soak seeds overnight first)
- Chives: 8–10 weeks before last frost
- Rosemary: 10–12 weeks before last frost (or just buy a transplant)
- Cilantro and dill: direct sow outdoors after last frost
Soil, Containers, and Growing Conditions
Most culinary herbs share a common preference: well-draining soil, plenty of sun, and moderate fertility. They evolved in Mediterranean climates — rocky, dry hillsides with poor soil and bright light. Rich, soggy compost beds actually produce inferior herbs with less flavor and more disease problems.
For outdoor beds, amend heavy clay or waterlogged soil with coarse sand and compost at a ratio of roughly 1 part sand, 1 part compost, and 2 parts existing soil. Aim for a pH of 6.0–7.0. Raised beds are ideal for herb gardens because drainage is easy to control and you can tailor the soil mix from the start.

For container growing, use a quality potting mix — not garden soil, which compacts and drains poorly in pots. A standard potting mix with added perlite (about 20% by volume) creates the fast drainage most herbs prefer. Terracotta pots are excellent for rosemary, thyme, and sage because the clay wicks away excess moisture. Plastic pots retain more water and suit basil better in hot, dry climates.
Pot size matters more than most beginners realize:
- Basil: minimum 20–25cm (8–10 inches) diameter per plant
- Parsley and chives: 15–20cm (6–8 inches) diameter
- Rosemary: at least 30cm (12 inches) diameter — it needs room to establish roots
- Mint: 20–25cm (8–10 inches), grown alone in its own container
Sun requirements are non-negotiable for most herbs. A south-facing windowsill indoors will provide roughly 4–6 hours of direct light in summer — adequate for parsley and chives, but marginal for basil and rosemary, which prefer 6–8 hours. A grow light positioned 15–30cm (6–12 inches) above the plants eliminates this problem entirely for indoor setups.
Watering, Feeding, and Common Mistakes
The single most common cause of herb failure is overwatering. Herbs in containers, especially basil, will show stress that looks exactly like drought — wilting, yellowing, dropping leaves — but is actually caused by roots sitting in wet soil with no oxygen. Before watering any herb, push your finger 2–3cm (about an inch) into the soil. If it’s still moist, wait. Water only when the top layer feels dry.
When you do water, water deeply and thoroughly until it runs freely from the drainage holes, then let the pot drain completely. Shallow, frequent sips encourage shallow roots and make plants less resilient to heat and drought.
Outdoor herbs in well-draining soil are more forgiving, but the same principle applies. Mediterranean herbs like rosemary, thyme, and oregano actually prefer dry conditions between waterings, especially in summer. Basil is the exception — it likes consistent moisture and will bolt (go to seed) faster if stressed by drought.
Feeding guidelines:
- Perennial herbs (rosemary, thyme, oregano, sage): a single application of balanced granular fertilizer (10-10-10) in early spring is usually sufficient. Over-fertilizing these herbs produces lush, weak growth with reduced essential oil content and therefore less flavor.
- Annual herbs (basil, parsley, cilantro): benefit from a light liquid feed every 3–4 weeks during the growing season. Half-strength balanced liquid fertilizer works well.
- Chives: respond well to a nitrogen boost in spring to encourage leafy growth.

Other common mistakes to avoid:
- Planting rosemary and basil next to each other in the same container — they need very different watering schedules.
- Letting herbs flower and go to seed (except intentionally for seed saving) — this signals the plant to stop producing leaves.
- Using garden soil in pots — it compacts and suffocates roots.
- Harvesting more than one-third of the plant at once — it stresses the plant and slows recovery.
Harvesting the Right Way to Keep Plants Producing
For bushy herbs like basil, lemon balm, and mint, always cut just above a pair of leaves or a leaf node — never leave a bare stem above the last leaves. This is where the plant will branch and send out two new shoots. Cut from the top of the plant, working downward. This keeps the plant compact and prevents it from becoming leggy. The smell of fresh basil as you pinch out those growing tips on a warm afternoon — that slight sweetness mixed with anise and pepper — is one of the genuinely good sensory rewards of kitchen gardening.
For upright herbs like rosemary, thyme, and sage, cut soft, flexible green stems rather than thick woody ones. Woody stems won’t re-sprout reliably. Take the youngest growth from the tips of branches, leaving at least two-thirds of the plant intact.
For strap-leaf herbs like chives and parsley, cut individual stems from the outside of the plant down to about 2–3cm (1 inch) from the base. New growth comes from the center, so harvesting the outer leaves first keeps the plant producing continuously.
The most important harvest rule: never take more than one-third of the plant in a single cutting. A plant that’s cut too severely will divert energy from leaf production to survival and recovery.
For basil specifically, pinch out any flower buds the moment you see them forming. Once basil flowers, leaf production slows and the flavor of remaining leaves becomes more bitter. Catching it early — those pale green square stems with tiny paired buds — adds weeks of productive growth to the plant.
Preserving and Storing Fresh Herbs
Even the most prolific kitchen garden will occasionally produce more than you can use fresh. Knowing how to preserve different herbs properly keeps nothing going to waste.
Refrigerator storage (short-term, 1–2 weeks):
- Treat soft herbs like basil and parsley like cut flowers. Trim the stems and stand them in a glass of water on the countertop (basil) or in the fridge (parsley, cilantro, dill). Cover loosely with a plastic bag.
- Woody herbs like rosemary and thyme can be wrapped in a slightly damp paper towel, placed in a zip-lock bag, and stored in the fridge for up to two weeks.

Freezing (best for soft herbs, 3–6 months):
- Chop herbs finely and pack them into ice cube trays with olive oil or water. Once frozen, transfer the cubes to a labeled freezer bag. Drop a cube directly into soups, sauces, or stir-fries. This method works brilliantly for basil, parsley, chives, cilantro, and tarragon.
- Whole herb leaves can also be spread on a baking sheet, frozen until solid, and then stored in bags — though the texture suffers compared to the oil-cube method.
Drying (best for woody herbs, 6–12 months shelf life):
- Rosemary, thyme, oregano, sage, and bay leaf dry exceptionally well and are actually more intensely flavored dried than fresh. Tie stems in small bundles and hang them upside down in a warm, dry, well-ventilated spot out of direct sunlight. Most herbs are fully dry in 1–2 weeks.
- Soft herbs like basil and parsley lose most of their flavor when dried and are better frozen.
Herb-infused oils and vinegars are another excellent preservation method and also make genuinely useful kitchen staples. Rosemary and garlic infused in olive oil, or tarragon in white wine vinegar, can be made in under 30 minutes and last several months stored in a cool, dark spot.
Seasonal Growing Guide by USDA Zone
When you plant, how you manage, and what you grow depends heavily on your climate zone. Here’s how to time a kitchen herb garden across the main zones.
USDA Zones 3–5 (Cold winters, short growing seasons)
The growing window is roughly May through September. Start basil, parsley, and chives indoors 8–10 weeks before your last frost date (typically late May in Zone 5, early June in Zones 3–4). Most perennial herbs like thyme, chives, and sage are reliably winter-hardy in Zone 5 and will return each spring. Rosemary is typically not hardy below Zone 7 outdoors — grow it in a container and bring it inside before the first hard freeze. Protect container herbs from late spring frosts with a light fleece cover.
USDA Zones 6–7 (Moderate climates, four distinct seasons)
This is the sweet spot for most culinary herbs. Direct-sow cold-tolerant herbs like cilantro, parsley, and chervil as early as 4–6 weeks before the last frost date — they handle light frost well. Basil goes out after all frost risk has passed. Perennials including thyme, oregano, sage, and chives will overwinter reliably with minimal protection. Rosemary may survive Zone 7 winters outdoors with good drainage and a sheltered position, but Zone 6 gardeners should treat it as a container plant. Get a second sowing of cilantro in late summer (about 8 weeks before first fall frost) for an autumn crop.

USDA Zones 8–10 (Mild winters, hot summers)
The year-round growing potential here is significant. Basil thrives in the summer heat but will bolt quickly during peak summer in Zone 9–10 — succession-sow every 3–4 weeks from March through September to maintain a continuous supply. The best growing window for cool-season herbs like parsley, cilantro, and dill is actually fall through early spring, when temperatures are mild enough to prevent bolting. Rosemary is perennial and will grow into a large shrub over several years. Protect Mediterranean herbs from excessive summer humidity in the Southeast, which promotes fungal disease — improve air circulation and avoid overhead watering.
Year-Round Indoor Growing
Regardless of zone, a basic indoor herb setup can produce year-round. A 45–60cm (18–24 inch) grow light strip, set on a timer for 14–16 hours of light per day, positioned close to a south or east-facing window, will keep basil, parsley, chives, and mint producing through winter in any climate. Keep indoor temperatures above 15°C (60°F) — cold windowsills in winter can stress roots even when the air above seems warm.
Cost Breakdown: Starting a Herb Garden on Any Budget
One of the appeals of herb gardening is that it scales to almost any budget and still produces meaningful results. Here’s an honest look at what you’ll spend at each level.
Budget Setup ($15–$35)
- Seed packets (basil, parsley, chives, thyme): $2–$4 each, roughly $10–$16 for a starter collection
- Basic potting mix, small bag: $6–$10
- Recycled containers (yogurt tubs, tin cans with drainage holes drilled): $0
- No grow lights — windowsill growing only
Total realistic spend: $15–$30. You’ll have fresh herbs within 6–8 weeks and cover most of your kitchen needs for a full season.
Mid-Range Setup ($60–$120)
- Mix of nursery transplants and seed packets: $25–$40
- Quality potting mix with perlite (large bag): $15–$20
- Terracotta or ceramic pots (4–6 medium-sized): $20–$40
- Basic liquid fertilizer: $8–$12
Total realistic spend: $70–$110. More reliable results, better-looking containers, and plants that produce well from the start.
Premium Setup ($150–$300+)
- Full LED grow light strip or panel: $40–$120
- Heat mat for seed starting: $20–$35
- Premium potting mix or custom blend: $25–$40
- Dedicated herb planter boxes or self-watering containers: $40–$80
- A range of specialty and heirloom herb seeds or transplants: $30–$50

Total realistic spend: $155–$325. This setup produces year-round indoors regardless of climate, handles multiple herb varieties simultaneously, and essentially replaces most grocery store herb purchases within a single season.
For context: a small bunch of fresh basil at a grocery store typically costs $2–$4. A single basil plant started from a $3 seed packet will produce 10–15 times that amount of usable herb over a season, bringing the cost per use to cents rather than dollars.
Using Fresh Herbs in the Kitchen
Growing the herbs is only half the relationship. Using them well — knowing when to add them, what they pair with, and how heat affects their flavor — is what makes the effort worthwhile.
The core distinction every cook needs to know: delicate herbs lose their flavor quickly with heat, while robust herbs deepen and develop when cooked.
Add at the end of cooking (or raw):
- Basil — added to pasta off the heat, scattered over pizza after baking, torn into salads
- Cilantro — stirred into curries at the last moment, mixed into salsas, used as a fresh garnish
- Chives — snipped over eggs, soups, potato dishes — never cooked
- Parsley — added in the last 2 minutes of cooking, or used raw as a garnish and flavor brightener
- Dill — folded into yogurt sauces, scattered over salmon just before serving
- Tarragon — dressed into vinaigrettes, stirred into cream sauces off the heat
Add early in the cooking process:
- Rosemary — added to olive oil at the start of roasting meats or vegetables; its woody stems can be used as skewers
- Thyme — goes in with the onions at the beginning of soups, stews, and braises; its flavor integrates beautifully with long cooking
- Sage — fried briefly in butter until crisp, or added to stuffings and slow-cooked pork dishes early in the process
- Oregano — added early to tomato sauces and braised dishes where its slightly bitter edge mellows over time
- Bay leaf — dropped into stocks, soups, and stews at the start and removed before serving
One particularly underused technique: make a simple herb oil. Blanch a large handful of parsley, basil, or chives in boiling water for 30 seconds, transfer to ice water, squeeze dry, then blend with 120ml (½ cup) of good olive oil. Strain it. What you get is a brilliantly green, intensely flavored oil that will keep in the fridge for a week and transforms a plain piece of fish, a bowl of soup, or a plate of roasted vegetables with a single drizzle. That vivid green color, the grassy sharpness against a rich broth — it’s the kind of kitchen result that makes you genuinely glad you grew the plants.

Frequently Asked Questions
Why do my supermarket herb plants keep dying?
Supermarket herbs are grown as short-term products, not long-term plants. They’re usually 10–20 seedlings packed into one small pot, which creates intense root competition and makes them difficult to keep alive. For lasting results, repot immediately into a larger container with fresh potting mix, thin to 2–3 plants, and give them a south-facing position with at least 6 hours of light per day.
Can I grow herbs indoors year-round?
Yes, with the right light. A south-facing window works for lower-light herbs like parsley, chives, and mint. Basil and rosemary need more intensity — a dedicated LED grow light set to 14–16 hours per day makes year-round indoor growing reliable for almost any culinary herb. Keep temperatures consistently above 15°C (60°F) and watch for overwatering, which is more common indoors than outdoors.
How do I stop basil from flowering?
Pinch out flower buds the moment you see them forming at the top of the plant. This redirects the plant’s energy back into leaf production. Harvesting regularly from the growing tips also helps delay flowering. Once basil has fully flowered and set seed, it’s difficult to reverse — start a new sowing if that happens. Succession-sow every 4 weeks to always have young, productive plants on hand.
Which herbs grow well together in the same container?
Group herbs with similar water and light needs. A good “Mediterranean mix” container works well with rosemary, thyme, oregano, and sage — all prefer dry conditions and full sun. A separate “moisture-loving” pot can hold basil and parsley together. Keep mint alone always. Cilantro and dill are best direct-sown in their own spots because they don’t transplant well and bolt quickly.
When is the best time to harvest herbs for the most flavor?
Harvest in the morning after the dew has dried but before the heat of the day peaks. Essential oil content — the source of flavor and aroma — is highest in the morning. For most herbs, harvest just before or as flower buds form, which is the point of peak flavor in the plant’s growth cycle. Avoid harvesting after heavy rain, which dilutes essential oils temporarily.
Explore more
Identifying and Safely Handling Common Poisonous Plants in Your Garden
DIY Garden Art Projects Using Recycled Materials: Transform Trash into Stunning Outdoor Sculptures
Growing Berries: Tips for Growing Blueberries, Blackberries, and More
Why Your Fresh Basil Keeps Dying Indoors (And How to Finally Keep It Alive)
10 Essential Herbs Every Home Cook Should Grow on a Windowsill
How to Tell When Your Watermelon Is Ripe: 5 Foolproof Signs
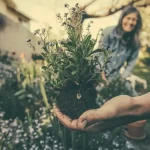
📷 Featured image by Jacob Thomas on Unsplash.