
On this page
- Essential Tools and Equipment for Garden Measurement
- Creating an Accurate Base Map of Your Property
- Documenting Sun Patterns and Microclimates Throughout the Day
- Recording Soil Conditions and Drainage Patterns
- Planning Garden Zones Based on Access and Functionality
- Calculating Space Requirements for Different Plant Types
- Digital Mapping Tools and Apps for Modern Garden Planning
- Cost Breakdown for Garden Mapping Supplies
- Frequently Asked Questions
Staring at your yard with ambitious gardening plans but no clear sense of where to actually plant anything creates more frustration than fresh vegetables. Without proper measurements and mapping, you’ll end up with overcrowded beds, plants struggling in the wrong conditions, and pathways that make no practical sense. Smart Garden planning starts with understanding exactly what space you’re working with and how to use it effectively.
Essential Tools and Equipment for Garden Measurement
Accurate garden mapping requires more than pacing off distances and eyeballing sunny spots. Professional-quality measurements start with the right tools, most of which you probably already own or can borrow from neighbors.
A 100-foot measuring tape forms the backbone of any garden survey. Choose one with clear markings visible in outdoor light – the thin metal types work better than cloth versions that stretch over time. For smaller measurements within beds, a 25-foot tape provides easier handling when measuring plant spacing and pathway widths.
Wooden stakes or metal landscape pins mark key reference points while you work. Bright surveyor’s tape tied to each stake makes them visible from across the yard and prevents you from losing track of important corners and boundaries. The satisfaction of driving that first stake into the ground and knowing you’re building something systematic never gets old.
Graph paper creates the foundation for your master plan. Quarter-inch grid paper works perfectly for most residential gardens, allowing each square to represent one square foot of actual space. Bring several sheets – you’ll make multiple drafts as ideas evolve. Colored pencils help distinguish different elements like structures, pathways, and planting areas.
A clipboard protects your drawings from wind and provides a stable writing surface outdoors. Include several regular pencils and a good eraser – measurements change as you refine your understanding of the space.
Smart phone cameras capture details you might forget when transferring measurements indoors later. Take photos from multiple angles, especially showing how structures cast shadows at different times. These reference images prove invaluable during winter planning sessions.

Creating an Accurate Base Map of Your Property
Building an accurate base map requires systematic measurement starting from fixed reference points that won’t change over time. Your house provides the most reliable starting point, since its dimensions and position remain constant regardless of landscaping changes.
Begin by measuring your house’s exterior dimensions. Record the length of each wall, noting the positions of doors, windows, and outdoor fixtures like water spigots or electrical outlets. Mark downspouts and foundation plantings that might affect drainage patterns around your planned garden areas.
Establish a grid system using your house as the primary reference point. Choose one corner of your house as your “zero point” and measure outward from there to map property boundaries, existing trees, sheds, and other permanent structures. This creates a coordinate system that allows you to locate any point in your yard precisely.
Property boundaries deserve special attention, especially if you’re planning near fence lines or neighbor relationships matter to your gardening success. Many homeowners assume they know their property lines but discover surprises when measuring carefully. Check your property survey if available, or use obvious markers like existing fences and sidewalks as reference points.
Document elevation changes that affect water drainage and growing conditions. Even slight slopes influence where water collects after rain and which areas stay drier. Use a simple line level attached to stakes to measure grade changes across your planned garden areas. Note areas where water pools after heavy rain – these spots might need drainage solutions before planting.
Transfer your field measurements to graph paper using a consistent scale. One square equals one square foot works well for most residential lots, but larger properties might require a scale where each square represents four or nine square feet. Draw everything to scale – accurate proportions reveal spacing problems and opportunities you might miss with rough sketches.

Documenting Sun Patterns and Microclimates Throughout the Day
Sun exposure determines which plants thrive in each location, making light documentation one of your most important mapping tasks. Full sun, partial sun, and shade classifications seem simple until you realize how dramatically shadows change throughout growing seasons and daily cycles.
Track sunlight patterns during a typical day in late spring when leaves have emerged but haven’t reached full summer density. Start observations at 8 AM and check every two hours until 6 PM, marking which areas receive direct sunlight at each time. The warm morning sun hitting your face as you stand in what will become the tomato patch gives you confidence that heat-loving crops will thrive there.
Seasonal sun angle changes affect light exposure more than most gardeners realize. Winter sun sits much lower in the sky, allowing light into areas that stay shaded during summer months. A deciduous tree that provides perfect summer shade might block crucial winter light from a greenhouse or cold frame location.
Create a shadow map showing how buildings, trees, and fences cast shadows throughout the day. Draw shadow outlines directly on your base map using different colors for morning, midday, and afternoon shadows. This visual representation helps identify full-sun areas (6+ hours daily), partial sun locations (4-6 hours), and shaded spots (less than 4 hours).
Microclimates within your garden space influence growing success as much as overall sun exposure. South-facing walls reflect heat and create warmer growing zones, sometimes allowing crops to grow weeks longer than in open areas. North sides of buildings stay cooler and retain moisture longer, perfect for lettuce and other cool-season crops during hot summers.
Wind patterns affect plant health and water needs significantly. Note which areas receive consistent breezes that help prevent fungal diseases versus sheltered spots where air circulation remains poor. Areas protected from prevailing winds might support taller plants without staking, while exposed locations need windbreaks or shorter varieties.
Document frost pockets where cold air settles during spring and fall. Low-lying areas and spots surrounded by structures often experience frost when higher areas remain frost-free. These microclimates determine safe planting dates for tender crops and influence variety selection for season extension.
Recording Soil Conditions and Drainage Patterns

Soil quality varies dramatically across even small garden spaces, making soil mapping essential for matching plants to optimal growing conditions. Different areas might need completely different soil amendments and management strategies.
Test soil composition in multiple locations using simple jar tests or professional soil testing kits. Dig samples from 6-8 inches deep in various spots across your planned garden area. Clay soils drain slowly and stay cooler in spring, while sandy soils warm quickly but need frequent watering and fertilizing.
Document existing soil pH across your garden space, since some areas might be naturally more acidic or alkaline than others. Foundation plantings often have higher pH due to lime leaching from concrete, while areas under pine trees tend toward acidic conditions. The sharp, clean scent of freshly turned earth tells you when soil moisture and temperature conditions are perfect for planting.
Map drainage patterns by observing water movement during and after rain events. Mark areas where water pools, flows quickly away, or soaks in steadily. Poor drainage areas need raised beds or drainage improvements before planting, while fast-draining spots require water-wise plant selections and irrigation planning.
Identify compacted soil areas caused by foot traffic, vehicle access, or construction equipment. These zones need soil improvement before successful gardening becomes possible. Compacted soil prevents root penetration and water infiltration, leading to plant stress and poor yields regardless of other growing conditions.
Note existing soil amendments and organic matter levels in different areas. Spots where leaves collect naturally or previous compost piles existed often have richer, darker soil with better structure. Former lawn areas typically need significant organic matter additions to support vegetable production.
Mapping Underground Infrastructure
Underground utilities, irrigation lines, and septic systems affect where you can dig and plant permanently. Mark the locations of water lines, electrical cables, gas lines, and septic system components on your base map. Most utility companies provide location services free of charge when planning garden installations.
Existing sprinkler systems influence garden placement and plant selection significantly. Note sprinkler head locations, coverage patterns, and watering schedules when planning bed locations. Some areas might receive too much water for Mediterranean herbs, while others need supplemental irrigation for successful vegetable production.
Planning Garden Zones Based on Access and Functionality
Functional garden design depends on understanding how you’ll actually use and maintain different growing areas throughout the season. Access patterns, maintenance requirements, and harvest timing determine optimal placement for different garden elements.

High-maintenance crops like tomatoes, peppers, and cucumbers need placement near water sources and primary access paths. These plants require frequent harvesting, regular pruning, and consistent watering, making convenience essential for success. Position these areas within 50 feet of your kitchen door and main water source when possible.
Create maintenance zones based on seasonal timing and care requirements. Early spring crops like lettuce and peas need accessible locations for frequent planting and harvesting, while storage crops like winter squash can occupy more remote areas since they’re planted once and harvested all at once.
Plan pathway widths based on actual garden cart and wheelbarrow dimensions plus comfortable walking space. Most garden carts require 30-36 inches of clear pathway width, while walking paths need minimum 24-inch clearance. The rhythmic crunch of gravel under cart wheels as you transport compost to distant beds becomes part of the garden experience when paths are properly designed.
Design service areas for compost bins, tool storage, and potting benches near garden centers but away from primary viewing areas. These utilitarian zones need good access but don’t require premium growing space or attractive placement.
Consider seasonal workflow patterns when positioning different garden elements. Place cold frames and season extension structures where they’re easily accessible during challenging weather but don’t interfere with summer garden maintenance. Root cellars and storage areas need convenient access during harvest time but stay out of active growing zones.
Water Access and Irrigation Planning
Map existing water sources and plan irrigation zones based on different watering needs and schedules. Group plants with similar water requirements together to simplify irrigation management and prevent over- or under-watering.
Calculate distances from water sources to planned garden areas to determine hose lengths needed or irrigation system requirements. Garden areas more than 100 feet from water sources often need dedicated irrigation systems or rain collection systems for practical maintenance.
Plan for rain collection and storage near high-water-use crops like leafy greens and summer squash. Position rain barrels and collection systems where they capture maximum rainfall while remaining accessible for garden use.
Calculating Space Requirements for Different Plant Types
Accurate space planning prevents overcrowding while maximizing garden productivity within available space. Different plants have dramatically different space requirements based on mature size, growth habits, and harvesting methods.

Vine crops like cucumbers, melons, and winter squash need substantial space allocations – up to 32 square feet per plant for indeterminate varieties. Plan vertical growing systems or dedicated vine areas rather than trying to squeeze these space hogs into traditional garden rows. Bush varieties require much less space but produce smaller yields over shorter periods.
Root vegetables need adequate depth rather than surface area, making them excellent choices for narrow beds and edge plantings. Carrots, radishes, and turnips grow successfully in beds as narrow as 12 inches wide, while larger root crops like daikon radishes need 18-24 inches between rows for proper development.
Perennial crops require permanent space allocation and long-term planning considerations. Asparagus beds need 4-5 years to reach full production but then produce for 20+ years in the same location. Rhubarb plants spread to 3-4 feet diameter over time, requiring space planning that accounts for mature plant size rather than initial planting dimensions.
Calculate bed dimensions based on comfortable reach distances for maintenance and harvesting. Most gardeners can comfortably reach 24 inches from bed edges, making 4-foot-wide beds optimal for access from both sides. Beds against fences or walls should stay under 30 inches wide for practical management.
Plan crop rotation areas that accommodate different plant families in different seasons. Solanaceae crops (tomatoes, peppers, eggplant) shouldn’t follow each other in the same soil, requiring rotation planning that considers space requirements for each family group across multiple years.
Succession Planting Space Management

Succession planting requires careful space allocation to maintain continuous harvests throughout growing seasons. Fast-growing crops like lettuce, radishes, and beans need replanting every 2-3 weeks, requiring dedicated bed space that rotates through planting cycles.
Plan bed sections specifically for succession crops rather than trying to fit new plantings into established crop areas. A 4-foot by 8-foot bed provides adequate space for continuous lettuce production for a family of four when managed with proper succession timing.
Calculate total seasonal space needs for succession crops by multiplying individual planting space by number of plantings planned. Spring lettuce might require 3-4 succession plantings, while fall lettuce needs 2-3 plantings for continuous harvest until frost.
Digital Mapping Tools and Apps for Modern Garden Planning
Digital tools supplement traditional measuring techniques with features that simplify complex planning tasks and provide professional-looking results. These technologies excel at handling calculations, storing multiple design versions, and sharing plans with family members or contractors.
Garden planning apps like iScape, Garden Planner, and PlanGarden allow precise measurement input and automatic calculation of plant spacing, mature sizes, and seasonal timing. These programs include extensive plant databases with specific variety information, making variety selection easier for novice gardeners.
Smartphone apps with measurement capabilities use device cameras to calculate distances and area measurements. Apps like Measure (iOS) or Ruler (Android) provide surprisingly accurate measurements for garden planning purposes, though they work best for shorter distances and require stable lighting conditions.
Google Earth provides excellent overhead views for large property mapping and understanding relationships between your garden and surrounding landscape features. The satellite imagery shows seasonal differences in vegetation and helps identify microclimates based on surrounding structures and topography.
Free online tools like SketchUp offer three-dimensional garden modeling capabilities for complex projects involving structures, elevation changes, and seasonal plant appearance. These tools require more learning investment but produce professional-quality results for ambitious garden projects.
Traditional CAD software provides precision measurement and drafting capabilities but requires significant learning curves for casual garden planning. Reserve these tools for complex projects involving irrigation systems, hardscaping, or professional installation requiring contractor drawings.
Integrating Digital and Physical Mapping
Combine digital tools with physical site measurements for optimal accuracy and usability. Digital tools excel at calculations and visualization while physical measurements provide ground truth for actual site conditions.
Use smartphones to photograph measurement points and create reference images that link digital plans to actual site conditions. GPS coordinates from phone cameras help relocate specific measurement points when returning to sites for verification or implementation.
Print digital plans at appropriate scales for field reference during implementation phases. Laminated printouts survive outdoor conditions better than regular paper copies and allow marking changes directly on plans during construction or planting.
Cost Breakdown for Garden Mapping Supplies
Professional-quality garden mapping requires investment in proper tools, but most supplies serve multiple gardening purposes beyond initial planning phases. Quality measuring tools last decades with proper care and support numerous garden projects over time.
Budget Option ($25-$45)
Basic mapping supplies provide adequate accuracy for simple garden planning without significant expense. A 100-foot measuring tape ($15-$20), graph paper pack ($3-$5), colored pencils ($5-$8), wooden stakes ($8-$12), and surveyor’s tape ($3-$5) cover essential measurement needs.
This budget approach works well for rectangular properties with simple layouts and minimal elevation changes. Accuracy remains sufficient for most residential vegetable gardens and flower bed planning.
Mid-Range Option ($75-$125)
Improved tools provide better accuracy and durability for serious garden planning projects. Add a 25-foot measuring tape ($12-$18), line level ($15-$25), metal landscape pins ($20-$30), professional graph paper ($8-$12), and basic soil testing kit ($20-$35).
This level includes tools for elevation mapping and basic soil analysis, supporting more sophisticated garden designs with proper drainage planning and soil management strategies.
Premium Option ($200-$350)
Professional-grade tools support complex garden projects and provide survey-level accuracy. Laser measuring device ($80-$120), professional transit level ($100-$150), comprehensive soil testing kit ($40-$60), weatherproof mapping supplies ($25-$40), and garden planning software ($50-$80).
Premium tools justify their cost for large properties, commercial growing operations, or gardens involving significant hardscaping and infrastructure development.
Frequently Asked Questions
How accurate do my garden measurements need to be for successful planning?
Measurements within 6 inches accuracy work fine for most residential garden planning. Precise surveying becomes important only for irrigation system installation, hardscaping projects, or property boundary issues. Focus on proportional relationships rather than absolute precision.
When is the best time of year to map my garden space?
Late winter through early spring provides optimal mapping conditions in most climates (USDA zones 3-9). Deciduous trees remain leafless for accurate sun exposure assessment, while spring soil conditions allow proper drainage evaluation. Avoid frozen ground periods when stake installation becomes difficult.
Should I hire a professional surveyor for garden planning?
Professional surveying makes sense for properties larger than one acre, complex elevation changes, or gardens requiring building permits. Most residential vegetable gardens succeed with careful homeowner measurements using quality tools and systematic approaches.
How do I account for plant growth when planning garden spaces?
Plan spacing based on mature plant sizes rather than transplant dimensions. Research specific variety information since plant sizes vary significantly within crop types. Bush tomatoes need 2-3 feet spacing while indeterminate varieties require 4-6 feet. Allow 25% extra space for first-year gardens until you understand your growing conditions.
What’s the most common mistake in garden space planning?
Underestimating maintenance access needs causes the most planning problems. Design pathways wide enough for garden carts, position high-maintenance crops near water sources, and ensure comfortable reach distances for harvesting. Gardens that look perfect on paper fail when daily maintenance becomes impractical.
Explore more
Garden Safety: How to Stay Safe While Gardening
Why Your Direct-Sown Seeds Keep Failing: 7 Critical Mistakes That Kill Germination
Starting Seeds Outdoors: Tips for Direct Sowing Your Seeds
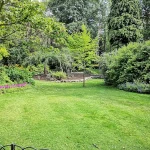
📷 Featured image by Steve Adams on Unsplash.